
How to Create Multilevel Numbered Headings in Word
Word’s numbered list options are numerous, and with all of that flexibility often comes a bit of confusion. It’s easy to add numbers or bullets to a simple list — a few quick clicks and you’re done. However, setting up a multilevel list, a list with items that have more than one level, can get tricky. In this article, we’ll review Word’s Multilevel List feature. Fortunately, it’s easier to implement and modify than you think once you understand how it works.
I’m using Microsoft 365 on a Windows 11 64-bit system, but this feature is available in earlier versions and stand-alone versions. However, the multilevel list options discussed in this article aren’t available in the online 365 browser edition. For your convenience, you can download the demonstration .docx and .doc files, or you can work with your own content.
Jump to:
How to create numbered headings in Word
Word offers two numbering features: one for simple lists and one for multilevel lists. You must use the latter to generate a multilevel numbered list, even if you use built-in heading styles. Figure A shows a document with two styled heading levels: Heading 1 and Heading 2.
Figure A
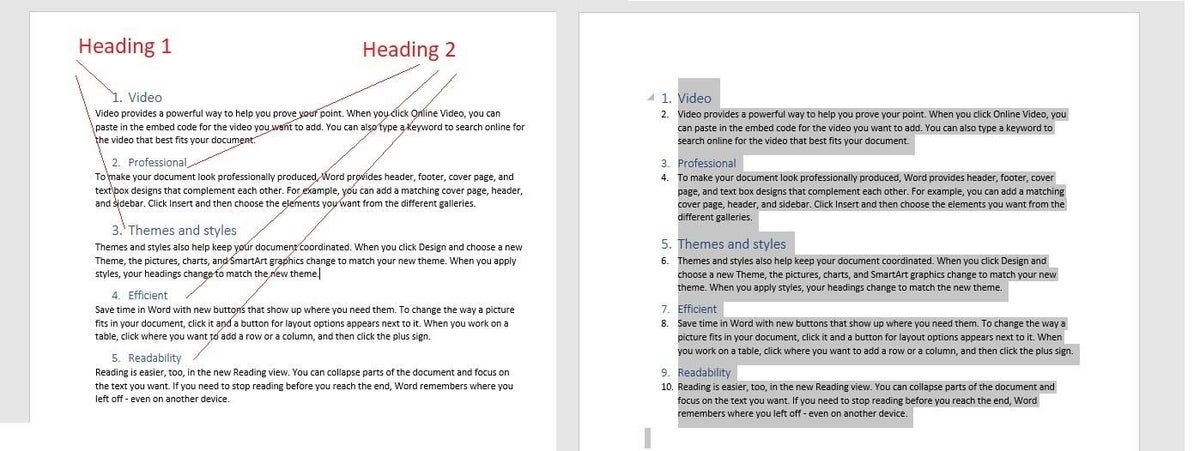
You can apply the Numbering option in the Paragraph group. Word will number the headings, but the feature ignores different levels; if you expected 1, 1.1, 2, 2.1, and 2.2, you might be surprised, even though the headings are using built-in heading styles.
If you select the entire document first, Numbering not only ignores the different levels, but it also numbers the paragraphs. You need the Multilevel List option.
SEE: Check out these annoying Word features (and how to turn them off).
If you use built-in heading styles, applying a multilevel list style can be as simple as a few clicks:
- Position the cursor anywhere in the document.
- Then, click the Multilevel List option, and choose an option (Figure B). This time, Word recognizes the styles and applies multilevel numbers as expected.
Figure B
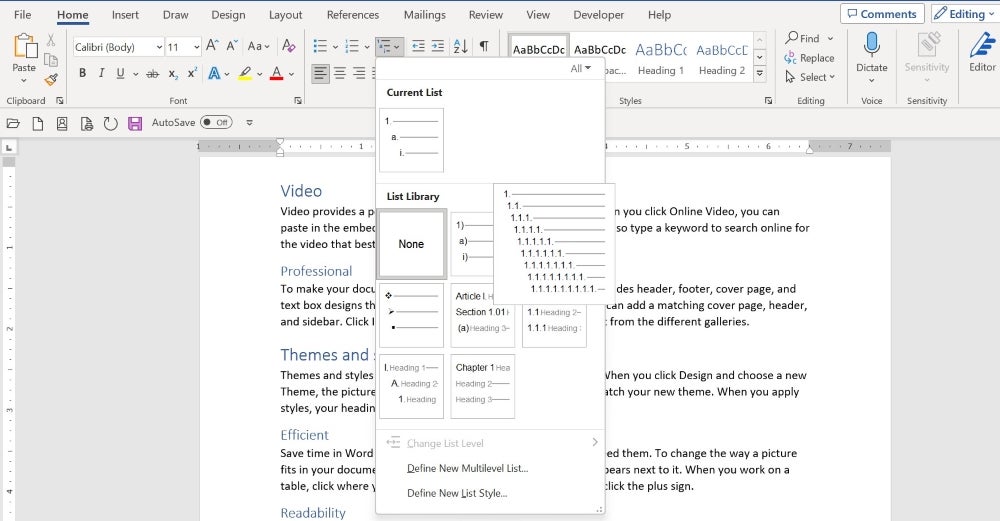
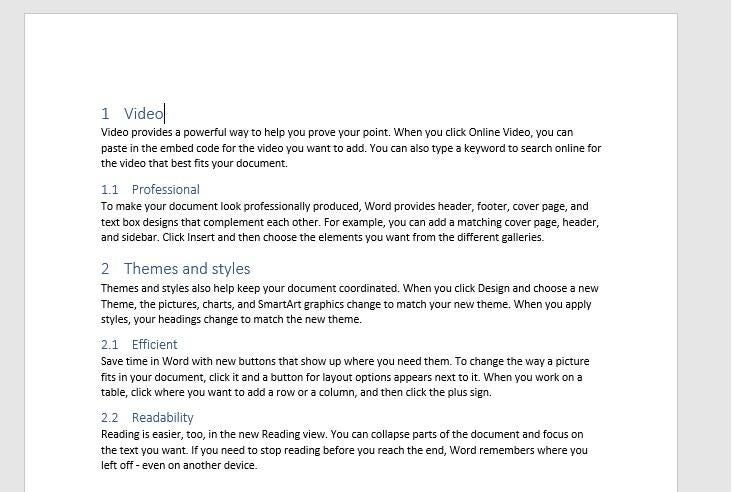
As you can see in Figure C, two quick clicks and you’re done! What’s important to note is that the List Library collection displays styles linked to the built-in heading styles: Heading 1 headings display 1 and 2. Heading 2 headings display 1.1, 2.1 and 2.2. If this works for you, you needn’t go any further.
Figure C
Modifying heading options
The default options are adequate most of the time, but you might want to customize the results a bit, and that’s where things can get a bit confusing. The options are straightforward, but there are a lot of them — Word can handle up to nine levels!
Word offers two ways to customize a multilevel list:
- Define New Multilevel List is used to create and save a stable custom list style.
- Define New List Style is used to change list styles and create a new style.
So, what’s the difference? The Define New List Style option lets you name a style, so you can share, modify and delete it later. Most users will never need this option.
Now, let’s move on. To modify multilevel list options:
- Click the Multilevel List option in the Paragraph Group. Word selects all lists currently in use in the List Library.
- Choose Define New Multilevel List. Figure D shows the resulting dialog.
Figure D
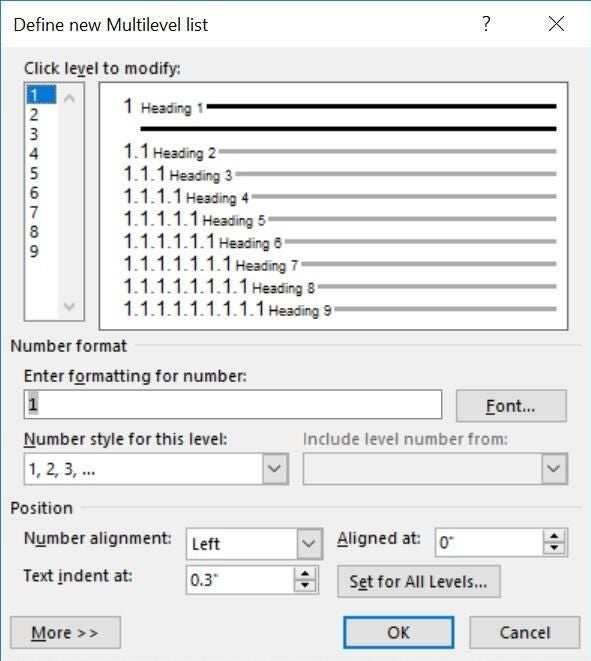
- Select the level you want to modify. You can change one, a few or all of the levels.
- Select a numbering format to apply to the chosen level, and adjust the formatting, spacing and aligning, and so on.
- Repeat the above for each level you want to change.
- Click OK when you’re done.
As mentioned, you can save the list style to a template, so you can use it with other documents. To do so:
- Select the list in the document.
- Access the Multilevel List dropdown, and choose Define New List Style.
- Enter a descriptive name, and select the New documents based on this template (at the bottom).
- Click OK, and the multilevel list style will be available in all new documents.
Multilevel numbered heading example
Let’s use what we’ve learned to modify the list applied earlier in Figure C. Specifically, we’ll change the numbering style for both levels and indent level 2. To begin, click anywhere inside the list area, and then do the following:
- Click Multilevel List in the Paragraph group, and then, choose Define New Multilevel List.
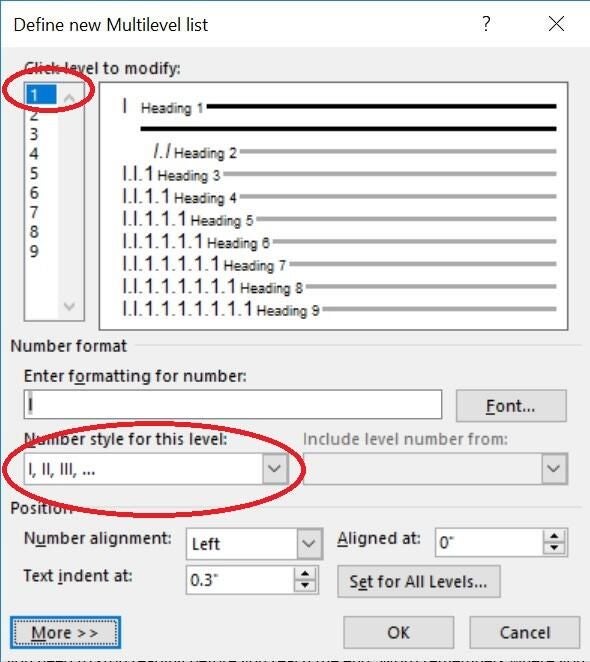
- Select 1 in the Click level to modify list to choose the first level.
- From the Number style for this level dropdown, choose I, II, III, (Figure E). We’re done with level 1.
Figure E
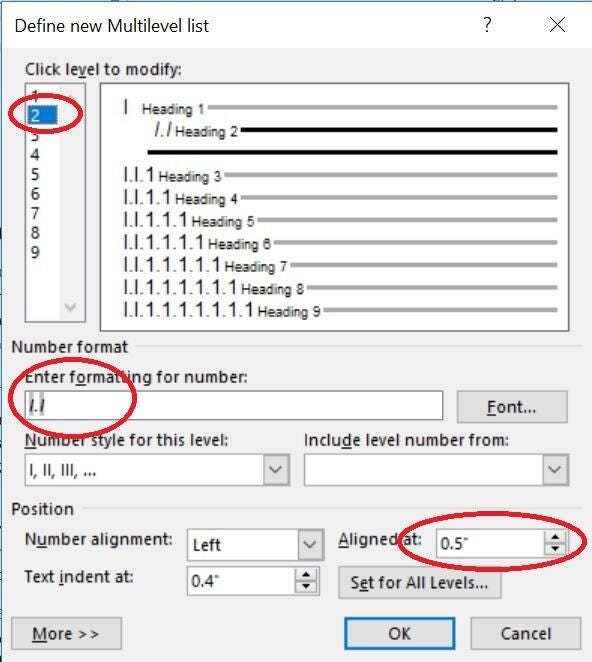
- Select level 2, and change the number style to l, ll, lll, as you did for level 1.
- Click the Font button, choose Italics and click OK.
- In the Aligned at field, enter .50. (Figure F).
Figure F
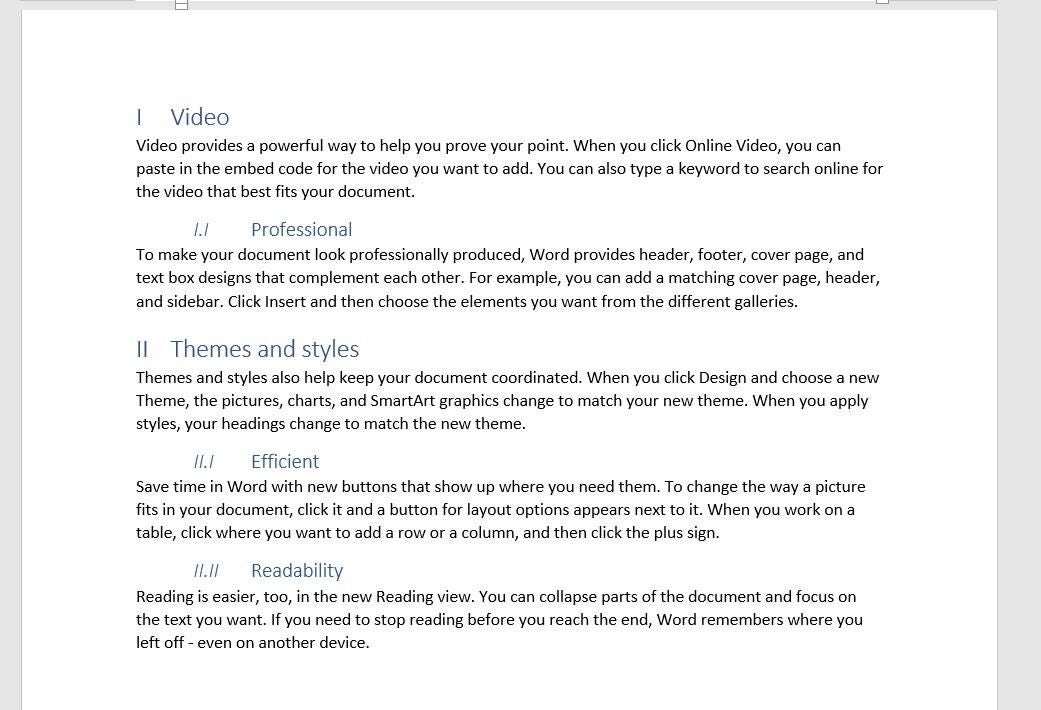
- Click OK to see the new list attributes in Figure G.
Figure G
Notice that the Font option when you applied italics changes only the number, not the heading text. To also update the heading text, modify the heading style as you normally would. Changing Heading 2 to include italics will change all instances of Heading 2 text, not only the text for numbered lists. If you don’t want to make a permanent change to Heading 2, you must create a custom heading style and refer to it when creating the multilevel list.
Modify your new heading style
Word assumes you want all Heading 1 and Heading 2 styles included in the new numbering scheme. If you want to omit a heading level from the scheme, don’t use a built-in heading style to format those headings.
Instead, you can reduce the amount of space between the number and the text by changing the Text indent at setting. Or, you can center the heading by choosing Center from the Number alignment dropdown. For even more options, click More to expose several more settings. You can use the Apply changes to option when setting level 1 to the I, II, III numbering style instead of changing it for each level.
SEE: Download our guide on things you should never do in Microsoft Office.
To add new levels to the list, simply add a lower level built-in heading style. For a visual review of the document’s structure, display the Navigation pane — click the View tab, and check Navigation Pane in the Show group.
This feature is easiest to use when you combine it with Word’s built-in heading styles. However, you can map a custom heading style to the multilevel numbering feature — it just takes more work. Word handles nine levels, but any document with more than four levels should receive a serious developmental edit. More than four becomes confusing and, perhaps worse, unreadable.
Source: News